Destination Spotlight

Making Bamboo Lanterns in a Temple

Making Bamboo Lanterns in a Temple

I discovered an awesome temple in Fukushima City! I’ve known that Ioji Temple existed for a long time, so I was really happy to finally get to visit.
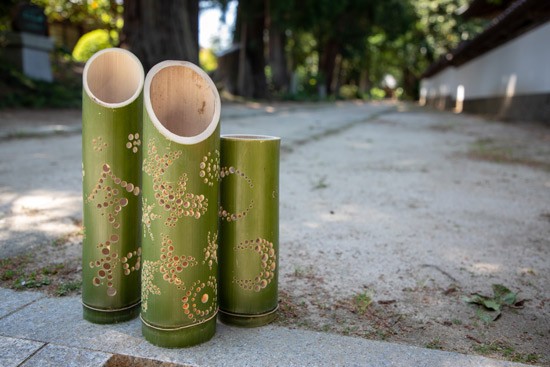
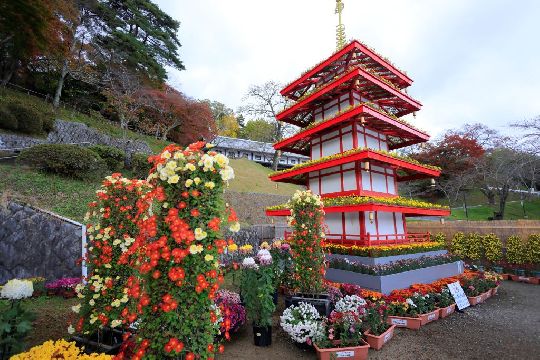
The architecture and traditional garden in the temple grounds make a visit to Ioji Temple worthwhile in itself, but what makes Ioji really special is the fact that you can make bamboo lanterns here!

Before I write about my experience making a lantern out of bamboo, let me introduce a little bit about Ioji Temple.

IOJI TEMPLE
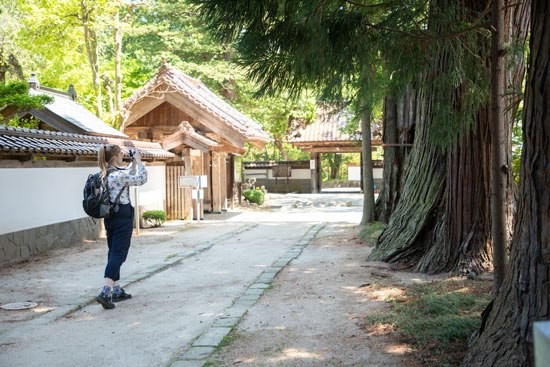
ABOUT IOJI TEMPLE

Ioji Temple was founded as a Buddhist place of worship in the year 826.

A statue of the Yakushi Nyorai (Buddha of Medicine) stands in the temple grounds, which might explain the temple’s name (医王寺 features the kanji “医” which means “medicine”, or “the healing art”.)

It’s thought that the statue was carved by the founder of a sect of Buddhism called Shingon Buddhism.
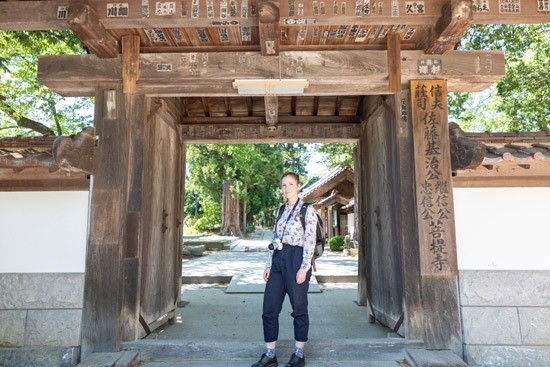
In the late Heian Period (794-1185), the temple was used by the Sato family, who were very important in Fukushima City and worked as administrators of the city's Shinobu district. During this period of time, the Sato household expanded the temple grounds so that the feudal lord of Otori Castle could look down from the castle in appreciation at the temple.

It’s possible to visit the nearby site where Otori Castle used to stand in Tatenoyama Park in Iizaka Onsen.
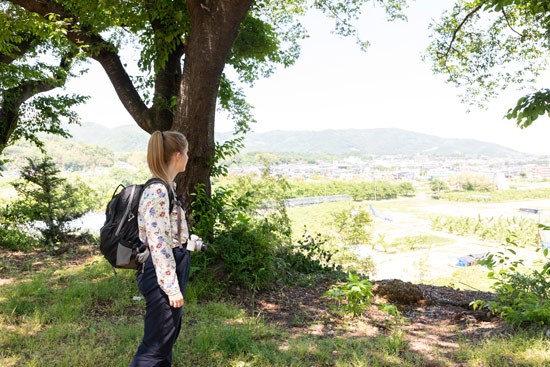
A more recent claim to fame for Ioji Temple is that it was visited by Matsuo Basho in 1689, whose name ranks among those of the most famous Japanese poets.

BAMBOO LANTERN MAKING EXPERIENCE

A local group from Iizaka Onsen in Fukushima City started running classes on making lanterns out of bamboo at Ioji Temple over the last few years. I was really excited to attend one of these classes and experience it for myself.

1. CHOOSING A DESIGN
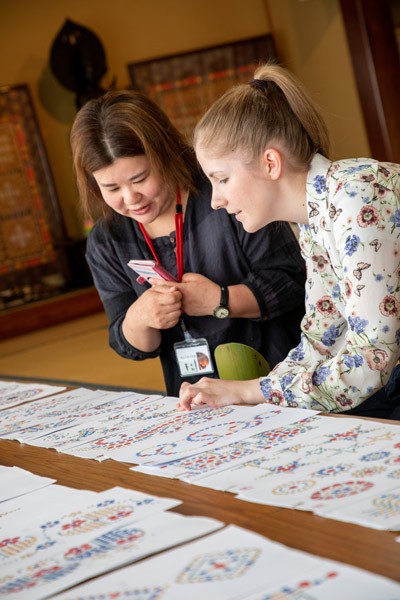
First I had to choose what pattern I wanted to carve into my bamboo. There were many preset patterns to choose from. The more dots include in the design, the more complicated it is, and the more time it takes to carve. I chose a pattern which included two goldfish swimming about.


2. CHOOSING YOUR BAMBOO

I got to choose from a variety of cuts of bamboo, which ranged in size and colour.

3. FIX YOUR PATTERN IN PLACE

Next I checked that the pattern I had chosen fit onto the bamboo and stuck it down with clear tape, making sure to avoid any pockets of air being trapped under the tape.

4. DRILL YOUR PATTERN

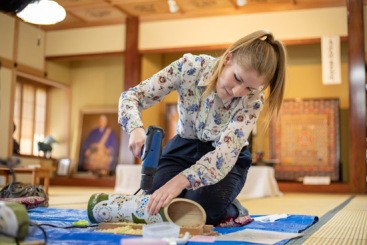
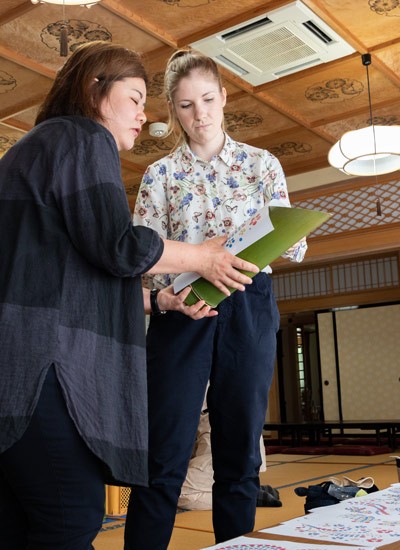
After taking a seat (well, sitting on a cushion), I used a hand drill to make holes in the bamboo. The holes on the pattern sheet were colour-coded so it was easy to know which size drill to use on which size holes.†

I had never used a hand drill before, but the teachers helped me work out how to use it, and held the bamboo steady for me while I opened up the first holes, since I was a bit nervous.

By the end of the experience, I felt like I had been drilling for years! I found this activity really fun and actually very relaxing!

The teachers advised me to open up the largest holes first, and the smallest holes last. I think this is partly because drilling the large holes took quite a bit of effort, and so you get pretty tired by the time you get to the small holes!

Some other tips they told me were:

  • Drilling becomes so much easier if you drill straight down onto the face of the bamboo instead of at an angle.
  • If your drill gets stuck in the bamboo after making a hole, press the trigger gently while raising it up slowly until you are able to pull it out.
  • The smaller the holes, the easier and quicker it is to drill them.

5. ADMIRE YOUR WORK
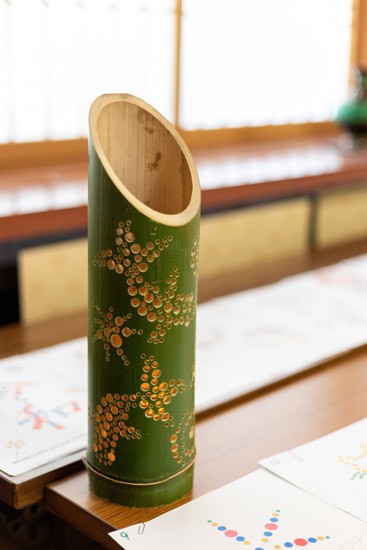
It took me about an hour to complete the design of my lantern. After I opened up the last holes, I used a brush that was available to brush away the sawdust (not sure if it’s still sawdust if it’s bamboo…), peeled away the tape that was holding the pattern sheet onto the face of the bamboo and took a good look at my finished design.

Some other visitors actually started working on their second design of the day at this point. They had stronger hands than me!


6. PUT A LIGHT IN IT

Putting a candle in the lantern would be quite the fire hazard, but LED candles are a great alternative. On the day of my visit, I could buy a short string of battery-powered LED lights in either orange or white. I chose a warmer orange colour and admire the lantern as I placed it inside and switched it on.


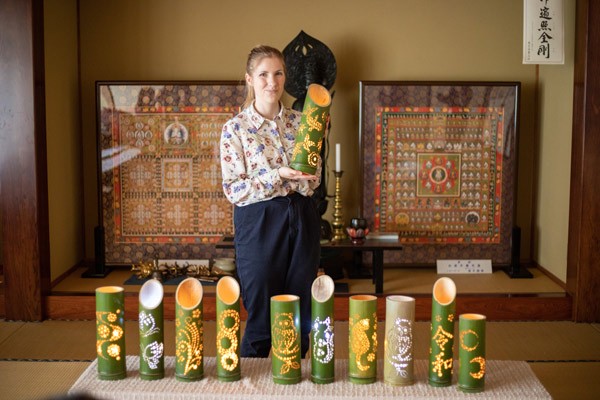
There were a number of other participants on the day of my visit. It was awesome to see the different designs we had made all lined up next to each other.
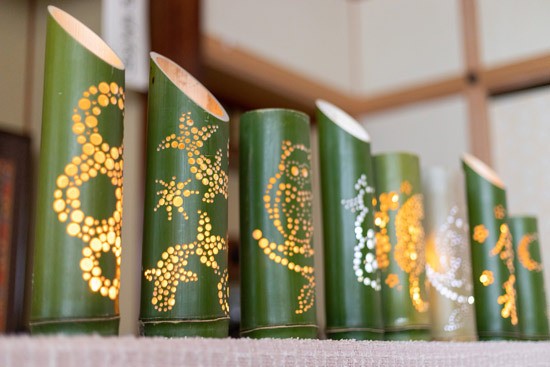
I think my favourite design is the one on the left with the 3 circles. This one was actually made by my colleague. I think it took quite a lot of arm-power to make, because of the number of larger-size holes, but it looked amazing with the light inside it.

7. TURN OFF THE LIGHTS

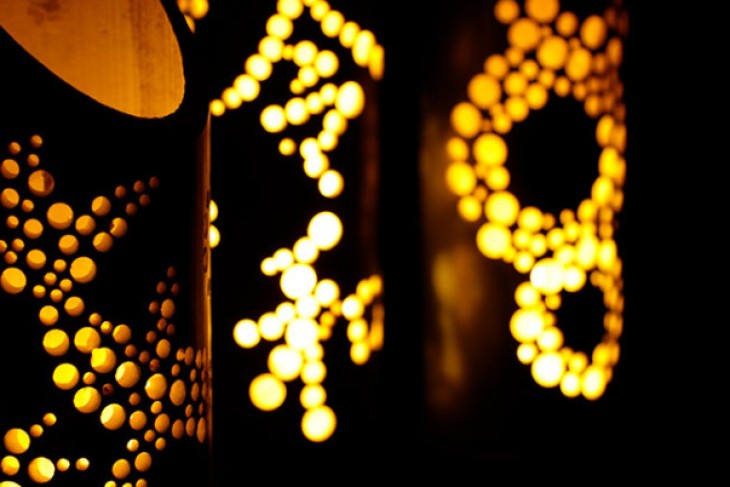
It’s hard to see the full impact of the lantern’s light with the lights on. Later on in the day, we turned off the lights and were rewarded with a beautiful sight.
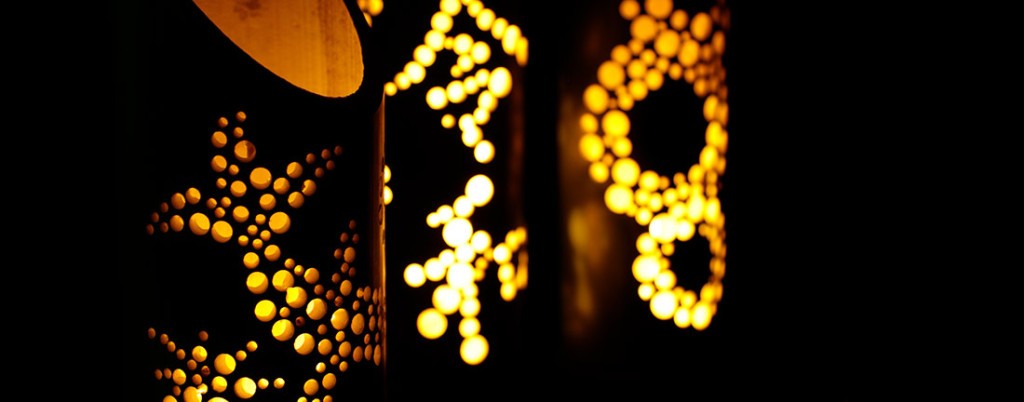
One thing to be aware of is that since the lanterns are made of bamboo, they begin to wither after 2-3 months. So it’s necessary to make the most out of the lanterns during their prime!

Also, visitors from abroad may not be able to take the lanterns back home depending on the customs regulations at your countries’ airports.

TIPS FOR DOING THIS EXPERIENCE

  • Wear something which is easy to move in
  • Don’t grip the drill too tightly!
  • Tie your hair up if you have long hair!

HOW TO DO THIS EXPERIENCE

  • There is an English speaking member of staff.
  • Run by: Take-toro no Kai (“Bamboo Lantern Group”)
    See their homepage here (Japanese only).
  • When: Classes are held a number of times a month. Please inquire via the Take-toro no Kai Facebook page.
  • Time taken: Around 2 hours. But in that time, you could make 2 lanterns.
  • Who can do it: Elementary school children can also do this experience with adult supervision.
  • Price: 2000 yen for adults, 1000 yen for children
  • Booking is necessary.
  • How to book: Send the Take-toro no Kai via their Facebook page.
VISITING IOJI TEMPLE

  • Entrance fee: 300 yen (Free for small children)
  • Opening hours: 8:30am – 5:00pm*
    *Closes early during winter.
  • See here for English-language information about Ioji Temple.

GETTING TO IOJI TEMPLE

  • 20 minute walk from Ioji-Mae Station on the Iizaka Line, which can be accessed from Fukushima Station.
    See here for information on taking the Iizaka Line train.
  • 15 minute cycle from Iizaka Onsen Station on the Iizaka Line. (You can rent bicycles for free at Iizaka Onsen Station.)
Latest posts

  1. Destination Spotlight

    Following Fukushima’s Footpath: A Forest Walk in Nishigo

    The tranquil village of Nishigo (西郷村) is situated just west of Shirakawa City, a naturally abundant region at the south of Fukushima Prefecture. We met with a group of community leaders, tour guides and members of the local government to take a Foothpath Tour around its many sights.What is a Footpath Tour?Inspired by the British culture of taking countryside walks in spots of natural greenery, Fukushima Footpath Tours encourage visitors to local areas to wander around and explore the nearby region.In particular, by walking through smaller and lesser known areas, eating at local restaurants, and interacting with town residents, you can play a role in Fukushima's diaster recovery efforts.A big part of the intrigue is visiting an area that people are less likely to frequent than famous tourist sites and discovering interesting places - perfect for people who like taking photos!Although there are self-guided tours available - take a look at our guides for Katsurao and Tamura - our tour featured about twenty visitors, and was led by a local long-term resident.Getting Back to NatureMy outstanding impression of our tour - and this, suitably enough, reminds me of similar walks back in the UK - was the abundance of woodland and the fantastic scenery.Our group worked its way through narrow corridors of beautiful pine trees, the terrain occasionally sloping up into the canopy, and wherever we went, we stumbled on to something interesting. Most striking was when we came to a clearing on the banks of the Abukuma River.We took a break here to take in the scenery. Later, when we shared our opinions of the tour, this was the highlight for many of us, thanks to the calm atmosphere and relaxing sound of the flowing river.Some people took this time to skip stones or try out the tree swing.Hidden TreasuresOne of the benefits of having a local resident show you around is that wherever you go, you can ask questions about the things you stumble across. Our guide also often pointed out local stores and workshops and told us about the crafts or folk art that they specialised in.The deeper we went into the woods, we also found some old abandoned houses, which had an intriguing, eerie atmosphere, and the local Christian church.A Well-Earned RestBy the time we made it back to base camp, we'd been walking for about two hours, doing a loop of the main woodland area of Nishigo. We were starting to run low on energy, making it the perfect time for lunch - our guide had been cooking since before we arrived, and a huge pot of Japanese curry had been bubbling the entire time we'd been walking.That meant the flavours had infused deeply into the sauce, and combined with the use of local Nishigo vegetables and rice, this was exactly what we needed after a long walk.Our tour was a really valuable experience - for me, the main attraction was having the chance to visit somewhere most tourists wouldn't usually go, learning about the area from someone who knows it well, and enjoying the peaceful woodland atmosphere.More informationInterested in trying a Footpath Tour for yourself? You can learn more here (please be aware that this page is in Japanese). 

    Following Fukushima’s Footpath: A Forest Walk in Nishigo
  2. Destination Spotlight

    Among a Sea of Clouds – Climbing Mt. Issaikyo

    Learn more about Mt. Issaikyo on our dedicated webpage. Despite Japan being such a mountainous country, and having lived here for several years, I was surprised to realise I’d never climbed to the summit of a Japanese mountain before. But that all changed recently when I attempted – and defeated, just about – the rugged trip up Mt. Issaikyo, one of Fukushima’s most popular hikes.Here's all the information about not only my trip, but how you can take on this challenge as well.Base Camp: JododairaOverlooking the Jododaira Plateau, the summit of Mt. Issaikyo (1,949m) is one of several possible trips from the Jododaira Visitor Center to different areas of the surrounding Azuma-Bandai mountain range.Many visitors head for the Kamanuma pond to the west or Okenuma pond to the south, both of which offer spectacular views over the water and are particularly stunning when the leaves change colours in autumn. Both of these trips, as well as the climb up to the nearby Mt. Azuma-Kofuji crater, are shorter and less intensive walks accessible to any experience level.The nearby Visitor Center is also a great spot to enjoy lunch; there is a traditional shokudo (canteen) style restaurant that serves classic Japanese staples like curry and ramen. There’s also a souvenir shop, a great place to pick up snacks or Fukushima goods like the iconic akabeko red cow.The Jododaira area in general is well known as being a volcanic one – a major eruption from Mt. Azuma-Kofuji in 1888 created hundreds of lakes, including the popular Goshiki-numa, and the hot mountain spring water serves nearby onsen hotels to this day. Sometimes you’ll see local construction staff wearing gas masks to protect against volcanic gases when exposed for long working days.The Climb: Leg DayAs a first-time hiker, I was a little apprehensive about the journey to the summit, but the initial stretch of the journey was easy – a leisurely walk along the boardwalk through the marshlands heading into the foothills.From there, the path begins to become rockier, steeper and less steady, and this largely continued for the remainder of the hike. There are plenty of natural rest stops on the way, however, including a mountain hut with toilets and medical supplies in case of an emergency.Also, this route provides fantastic views over Azuma-Kofuji. Although it was easy to feel some jealousy towards the visitors who chose the easier hike (only 10 minutes up the steps from Jododaira, then a 45 minute stroll around the crater), the gorgeous weather made for some beautiful photos.Although the volcanic crater is visible further up Mt. Issaikyo, on occasion it was obscured by the rocky slope or by the shifting cloud cover, so the best photo spot was probably somewhere halfway up the ascent.This was also where we met many hikers coming back down the mountain in the opposite direction, many of whom greeted us warmly and wished us luck on our climb.The SummitBy the time we made it to the top, our tired legs and lungs certainly needed a rest, but we were rewarded with breathtaking views of pristine white clouds stretching as far as the eye could see. In contrast to the view from Azuma-Kofuji, which looks across the green expanse of Fukushima City, being surrounded by clouds made it feel like we’d stepped into another world.From here, we wandered slightly to the western part of the summit, where from over a gravelly slope we spied the view that attracts intrepid hikers from all over Japan.Known as Majo-no-Hitomi or ‘The Witch’s Eye’, this flawless lake of crystal blue is truly a sight to behold, and definitely made the tough climb worthwhile.The Descent... in the Wrong DirectionTempted for a closer look, we headed down the steep slopes that lead off the summit. The grip underfoot here can be rocky and unsteady, so this was where my hiking boots came most in handy. Once we got into the more forested areas again, the path occasionally fell away into a slight drop, too, so some very light mountaineering was required.The journey from the summit down to the Witch’s Eye took about thirty minutes, and again we were awestruck:The beauty of the lakefront was even more striking up close, making it the perfect place to stop and recharge our batteries with a quick lunch by the water. We spent another half an hour down here, taking a much-needed rest and enjoying the perfect summer weather.All that was left was to climb Mt. Issaikyo for the second time on the day, and we would be on our way home...By the time we made it back to Jododaira, the fine weather from earlier has dissipated and a deep fog had settled in.The round trip from Jododaira to the summit of Mt. Issaikyo, down to the Witch’s Eye, and back again, took us roughly five and a half hours (stopping for 30mins for lunch), and saw us walk the equivalent of 7.4km.Looking to climb Mt. Issaikyo for yourself? Some important advice: Wear sunscreen! Despite the shaded areas, large parts of the hike are exposed to the elements. Bring plenty of water, and snacks or lunch to keep your energy up! Hiking boots are highly recommended. The mountain is closed to climbers in winter.Looking for more hikes in Fukushima? Consider Mt. Adatara or Mt. Bandai.

    Among a Sea of Clouds – Climbing Mt. Issaikyo
  3. Useful Information

    How to Enjoy Fruit Picking in Fukushima: The Ultimate Guide

    Fukushima Prefecture has been called the ‘Fruit Kingdom’ for its abundance of orchards – in particular, the western half of Fukushima City is overloaded with fruit farms of all kinds and colours. This long strip of farmland is known as the ‘Fruit Line’, with over 20 orchards located in this region alone, and is one of the best places in Japan to enjoy a leisurely fruit picking experience during your trip.Unlike fruit picking in western countries, which is often an all-you-can-pick experience, fruit picking in Japan more closely resembles all-you-can-eat. You are usually given a set time period after you arrive – likely 30 minutes to an hour – during which you’re welcome to pick and eat as much fruit as you like. You’re asked not to take any fruit home with you from the picking area, although most orchards have a shop where the best of recent batches can be bought, often at a lower price than supermarkets.Choose Your SeasonOne of the unique features of an area with so many orchards – and a variable four-season climate like Fukushima’s – is that there’s something delicious in season almost the whole year round. Since Fukushima is Japan’s second-largest exporter of peaches, they are one of the prefecture’s biggest symbols, and you’ll see them on billboards and posters wherever you go. That makes peach-picking season – roughly mid-July through September – one of the most popular times to visit the Fruit Line, and the peaches are first-rate no matter which orchard you visit.Also extremely popular is strawberry picking, available from November all the way through to May, and apple picking is also a big hit between August and December. These are the main exports of the famous Fruit Line, but depending on the season you can visit and taste everything from cherries and blueberries in summer to grapes and Japanese pears (nashi) in autumn.What to ExpectThe procedure is slightly different for each orchard – some stores have a ticket vending machine, others you pay at the front counter – but on the whole, orchard staff are very familiar with overseas visitors and will be happy to help you. During the fruit picking experience, a member of the fruit picking staff will explain how to recognise the difference between ripe fruit and non-ripe, and many orchards also have fruit on nearby tables that has been recently picked and is also free for you to eat. Depending on the fruit you’re picking, you may also be given a bucket (for example, for peach skins or pits) and a small knife to cut fruit or peel skin (although fruits like peaches and apples are arguably sweeter with the skin still on). Although English explanations are rarer, it’s relatively easy to understand the staff via gestures and demonstrations.After your time is up, retire to the main shop of the orchard to browse the local products – juices and jams are especially popular and make for good gifts. Marusei Orchard in particular boasts an onsite café that uses their own produce in a variety of sweet treats and parfaits, and there are pictures to help you decide.Getting to the Fruit LineSince buses are available but infrequent, and the Fruit Line is littered with orchards run by different families and companies, using a car or bicycle offers more freedom to explore the area and enjoy the local scenery. Here are our recommendations for getting to the Fruit Kingdom for yourself...Car RentalRenting a car in Japan is an excellent way to get around, and the sign-up process is surprisingly easy. In Fukushima City there are three rental stores close to the west exit of the bullet train station: the JR rental store located near the west exit bus stops; the Toyota store opposite the west exit courtyard; and the Orix store one block further west. All three offer single-day rentals (small ‘kei’ cars have four seats and are the most affordable option) and can be booked online with English support.On the day of the rental, go to the store and state your name. After checking your paperwork and ID, the store staff will ask you to inspect the car for damage, and mark any scratches or dents on their inspection sheet so you’re not charged when returning the vehicle. If required, the staff can also change the car’s navigation system to English.In order to drive in Japan, visitors must obtain an International Driver’s Permit and keep it on their person at all times while driving. You also must show the permit to staff during the rental process.JR Rent-a-car / Toyota / OrixBicycle RentalExploring the countryside on a rental bicycle is one of the best ways to experience Japan – when the weather is nice – and it’s a great way to ‘hop’ multiple orchards if you’re looking to peruse the local products. Despite being ringed to the west by the Azuma mountain range, the Fruit Line is largely flat with a splendid green atmosphere, with most roads being flanked by fruit trees.As an example, if going to Marusei Orchard, take the Izaka Line to its final station of Iizaka-onsen (approx. 20mins), and rent cycles at the station. From there, take a leisurely bike ride headed west for about 10-15 minutes until you arrive at the orchard. (This itinerary would also work for visiting any orchard on the Fruit Line by bicycle.)TaxiTaxis are plentiful and available from the west exit of Fukushima Station, with drivers very familiar with the layout of the Fruit Line and able to drop you at any orchard of your choice. If returning to Fukushima Station, the orchard staff would be able to call a taxi to pick you up. However, since a round trip to the west of the city would likely cost around 7,000 yen – roughly the same price of a rental car for the day – it may be worth considering driving yourself or taking a train and renting bicycles.To learn more about the Fruit Kingdom and book your spot, visit our reservation page.

    How to Enjoy Fruit Picking in Fukushima: The Ultimate Guide
Top